Wednesday, November 27, 2013

Who Spilled the Coffee?

I did! A few weeks ago, my dear friend Mackenzie gave me a brilliant art idea: spilled coffee designs on paper! I was interested immediately and set to work.

First, I took a mug of pre-made black coffee, gathered a stack of paper, and went outside to complete the project. The paper I used was a variety of sorts: toothed paper, sketch book paper, even pages from old novels! I began by spilling little splotches of coffee here and there on a no-spill cutting board. Then I took a piece of paper and lightly dropped it on the board, without pressing down. For some of my pieces, I let the coffee drip down the page. Another method I used consisted of taking a piece of paper and swiveling my mug around until it spilled messily on the page. In addition, I used the spillage on the page to create circles when pressing the base of the coffee mug on the paper. The goal here was "natural" spills and rings!

I left my designs outside to dry for close three hours. I found that for darker coffee stains, a great deal of coffee was needed, to the point where it pooled on the page. Darker designs took much longer to dry as well. The lighter designs reminded me of water colors (: 

I was quite pleased with my results! I can't thank Miss Mackenzie enough. It was such a creative idea! I will use my coffee-stained paper for writing favorite quotes and letters to pen pals. Another bonus of this art project: wonderfully smelling paper!

My mug of coffee prior to spilling.
 
 
Splatters- still wet!
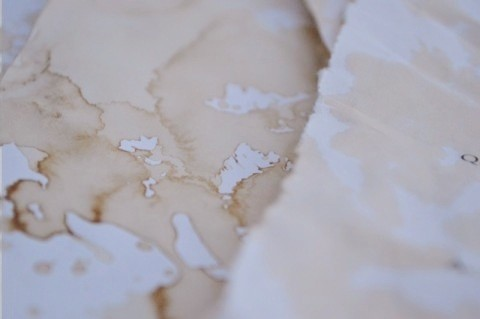
 
 
Dried.


I loved using old book pages for this project!


One of my lighter works.


Mackenzie and I met up at Starbucks a few days after I tried out her unique idea. I got to show her my results! So glad that I always have people in my life to inspire me.
 
The next time coffee spills accidentally, I guarantee I won't be so angry!
 
~Emily
 

Monday, November 11, 2013

Autumn Leaves: Here to Stay


It is official, my leaves that I experimented with last week are here to stay! Last week, I pulled my leaves out of the solution and patted them dry. I was greeted by new, permanent beauty! I fell in love with their delicacy, elegance, and representation of the colorful trees surrounding my home. Even though I found that the colors on some leaves became a bit more diluted and imperfections were magnified during the marinating process, I am extremely pleased with my results. I love trying something totally new, not knowing what the outcome will be! So without further ado, here are my lovely 2013 Fall Treasures!


Couldn't help holding a few of my leaves up to
my window to let sunlight shine behind them!


Such a great variety of colors!


This is my entire collection. I love each one! They are all incredibly unique. I am definitely giving a bunch to friends and family to share their beauty. My leaves will probably make an appearance on our Thanksgiving Dinner table as well! (:


~Emily

Saturday, November 2, 2013

Long Live the Leaves!

I'm definitely falling for Fall. Today, I only had one goal in mind: save the beautiful leaves of Autumn!  I can't help but fall in love with these amazing souvenirs of the season. The vibrant colors intrigue me and I admire how each leaf is different, unique. I constantly find myself going on leaf hunts around my neighborhood and then slipping the best ones inside letters to friends or gluing them inside my "Leaves and Pressed Flowers Book" (a work in progress). But I always hate the time when the edges of the leaf turn brown, curl up, and slowly devour the life inside. For that reason, I began to investigate how to preserve leaves.  Now, an experiment is in the works!


This morning, I went on a leaf hunt in my neighborhood. The crisp air felt so refreshing; it was a great adventure! These are the best of the leaves that I gathered, so I will use them for my experiment. I had to be very choosy when picking out my leaves. Preserved leaves last better if they do not have tears, insect bites, holes, or spots. They should not be completely dried out either.  

The variety of color I managed to find delights me!


A red star (:
 
 
 Details on a leaf never cease to disappoint.


This is my favorite leaf (:


After carefully rinsing the leaves, I slipped them inside a gallon-sized zip-loc bag, laying them completely flat.   
 

Next, I mixed 2 cups of water with 1/2 cup Glycerin and poured it into the bag. For this solution, it is only necessary to have enough to cover the leaves, so this recipe can be doubled or cut in half depending on the number of leaves inside the bag. After, I pressed out all the excess air, and zipped it up! Making sure the solution was covering all the leaves, I set the bag in a cool spot for "marinating". Once 3 to 4 days has gone by, I will take them out and pat them dry! I'm itching to see the results. Having leaves last forever will truly be amazing! Check back soon to see how my little experiment turned out (:
 
~Emily